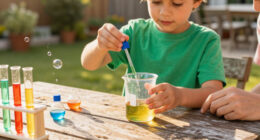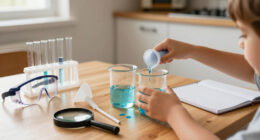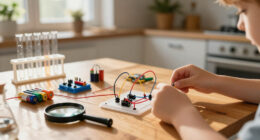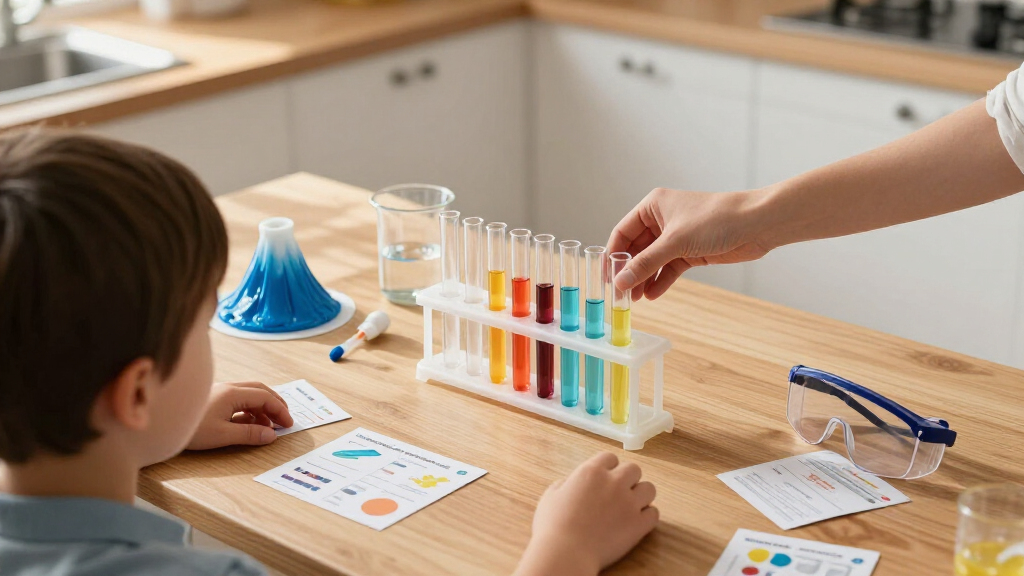
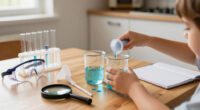
This guide shows you how to pick the right science experiment kit for a child, prepare a safe workspace, and walk through the experiments together so they actually work and the child actually learns. It is written for parents, grandparents, and caregivers with no science background — if you can follow a recipe, you can run a science kit. By the end, you will have completed at least one full experiment with a visible result (a color change, a crystal, a reaction, a working circuit), and you will know how to repeat the process for the rest of the kit. Most kits are designed for one 30-60 minute session per experiment, though some (like crystal-growing or plant kits) require multi-day waits.

Prime made for students and young adults
- Fast, free delivery for dorm and study essentials
- Prime Video and Amazon Music included
- Member-only deals
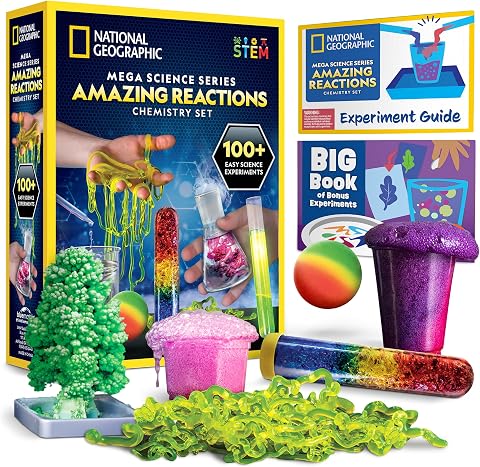
National Geographic Amazing Chemistry Set with 100+ Experiments for Ages 8-12
- ✔ Brand: Blue Marble
- ✔ Sub Brand: National Geographic
- ✔ Age Range: 8 years and up
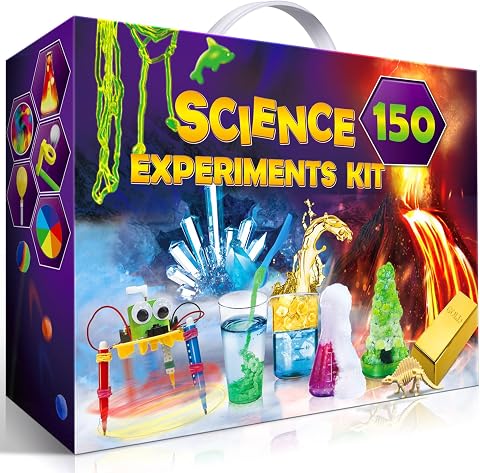
UNGLINGA 150 Experiments Science Kit for Kids – Chemistry Lab STEM Toys
- ✔ Brand: UNGLINGA
- ✔ Experiments Included: 150
- ✔ Recommended Age: 8 years and up

National Geographic Science Magic Kit with 100+ Experiments for Kids
- ✔ Brand: Blue Marble
- ✔ Sub Brand: National Geographic
- ✔ Age Range: 8 years and up
Difficulty: Beginner | Time: 30-60 minutes per experiment session
What You’ll Need
Tools & Materials:
- A commercial science experiment kit matched to the child’s age (chemistry, crystals, slime, circuits, volcanoes, microscope, or growing kits are common types)
- A flat, washable work surface (kitchen table, counter, or hard floor covered with newspaper or a plastic tablecloth)
- Paper towels or cleanup cloths
- A bowl or cup of water if the kit calls for it
- Safety glasses if the kit includes them, or inexpensive swim goggles
- A timer or phone clock
- A notebook and pencil for recording results (optional but recommended)
Knowledge:
- Basic ability to read and follow step-by-step instructions
- No science knowledge required — kits explain the concepts
Check the kit’s age rating on the box before buying. A kit rated well above the child’s age often uses chemicals, sharp tools, or small parts that create real safety problems. Kits labeled 8+ with chemicals generally require direct adult supervision; kits for ages 3-6 should be treated as parent-led activities rather than independent play.
National Geographic Amazing Chemistry Set with 100+ Experiments for Ages 8-12
This kit earns our top spot because it is the only one in the lineup that treats kids like actual scientists rather than spectators. The included test tubes, beakers, and pipettes are real lab tools, and the fifteen core experiments — bubbling color-changing solutions, glowing test tubes, crystal growing — teach genuine technique and observation skills. Compared with the UNGLINGA kit, which spreads itself across chemistry, physics, and earth science, this set goes deeper on a single discipline, which we think produces better learning for kids who are genuinely curious about how reactions work.The honest tradeoff: the "100+ experiments" headline is a bit misleading. Only fifteen experiments use included materials; the other eighty-five rely on baking soda, vinegar, food coloring, and other household staples. That said, the household-experiment booklet is where this kit grows with your child — once the guided materials run out, the open-ended experiments extend the kit’s life well beyond what a single-use box normally offers. Adult supervision is needed for some reactions, so this is a companion activity rather than a babysitter.
Pros:
- Real scientific tools including test tubes, beakers, and pipettes build authentic lab skills
- Clear progression from 15 guided experiments to 85 open-ended household experiments
- Strong replay value as the kit grows with the child’s confidence
- Award-winning brand with U.S.-based customer support for replacement parts and questions
Cons:
- Only 15 of the 100+ experiments use included materials
- Some chemical reactions require adult supervision
- Household-experiment booklet assumes you stock common items like vinegar and baking soda
Best for: Kids ages 8-12 who show real interest in chemistry and parents who want a kit that builds genuine lab skills
Not ideal for: Families who want every experiment ready to go from the box without gathering household supplies
Bottom line: The most complete package for serious young scientists — real tools, real chemistry, and room to grow.
“The most complete package for serious young scientists — real tools, real chemistry, and room to grow.”
UNGLINGA 150 Experiments Science Kit for Kids – Chemistry Lab STEM Toys
If your priority is sheer volume of activities, the UNGLINGA kit is the clear winner — one hundred and fifty experiments is triple the guided count of either National Geographic option. Where the Amazing Chemistry Set drills deep into chemistry, this kit casts a wide net across chemistry, physics, earth science, and surface tension, making it a better fit for kids who haven’t settled on a favorite branch of science yet.The illustrated step-by-step manual is genuinely kid-friendly, and the inclusion of safety goggles shows UNGLINGA took the "real scientist" framing seriously. The tradeoff is depth: with 150 experiments spread across multiple disciplines, few of them go much beyond a quick demonstration, and some still require common household items to complete. Compared with the Science Magic Kit, you lose the polished presentation and established brand support, but you gain far more activities — which matters most for long school breaks or multiple children sharing one kit.
Pros:
- 150 experiments spanning chemistry, physics, earth science, and surface tension
- Illustrated step-by-step manual kids can follow independently
- Safety goggles and kid-friendly lab tools included
- Wide topic coverage helps kids discover which science they like most
Cons:
- Experiments are generally shallower than the focused chemistry set
- Some activities require additional common household items
- Lesser-known brand means less established support infrastructure than National Geographic
Best for: Families who want maximum experiment variety at the lowest cost per activity, especially with multiple kids or long school breaks
Not ideal for: Kids who want to dive deeply into one scientific discipline, or buyers who prioritize established brand support
Bottom line: The most experiments per dollar in the lineup — breadth over depth, ideal for variety-driven kids.
“The most experiments per dollar in the lineup — breadth over depth, ideal for variety-driven kids.”
National Geographic Science Magic Kit with 100+ Experiments for Kids
Some kids light up at the word "experiment"; others hear "educational" and tune out. The Science Magic Kit is built for the second group. Its twenty magic-trick experiments — where kids seemingly bend rules of chemistry to wow an audience — serve as a Trojan horse for real scientific concepts. Compared with the Amazing Chemistry Set from the same manufacturer, this kit sacrifices lab rigor for engagement and performance, and for a skeptical eight-year-old, that trade is worth making.Where this kit beats both competitors is out-of-the-box readiness: everything needed for the twenty core experiments is included, so there is no mid-experiment scramble for vinegar or food coloring. Like its sibling kit, the headline "100+ experiments" leans on a bonus booklet of eighty-five-plus additional activities requiring household items, so temper expectations there. As a Toy Association Toy of the Year winner, it also carries the brand pedigree and U.S.-based support that UNGLINGA cannot match. The magic framing means less systematic skill-building, but if the goal is getting a screen-focused kid to voluntarily do science, this is the tool for the job.
Pros:
- All materials for 20 core experiments are included right out of the box
- Magic-trick framing engages kids who typically avoid educational toys
- Combines genuine chemistry learning with performance and presentation skills
- Award-winning kit with U.S.-based brand support and warranty options
Cons:
- Magic focus means less systematic scientific method than the chemistry set
- Bonus experiments require additional household materials
- Recommended for ages 8+, with younger kids needing adult assistance
Best for: Kids who resist traditional educational toys and respond better to performance, tricks, and showing off what they’ve learned
Not ideal for: Kids who already love lab work and want structured chemistry skill-building
Bottom line: The best hook for kids who need to be won over — magic tricks that smuggle in real chemistry.
“The best hook for kids who need to be won over — magic tricks that smuggle in real chemistry.”
As an Amazon Associate we earn from qualifying purchases.
Before You Start
Open the kit and read the instruction manual before the child sees it. Confirm every listed ingredient and tool is actually in the box — missing items are the single most common reason an experiment fails, and discovering this mid-experiment with an excited child waiting is frustrating. Do the inventory check against the parts list, usually printed on the box back or the first page of the manual. Also confirm which experiments need household items the kit does not include (water, vinegar, baking soda, cooking oil, and batteries are frequent additions).
Warning: If the kit contains powder packets or chemical vials, never let children open or mix them unsupervised, and never substitute household chemicals for kit ingredients. Keep all chemicals away from younger siblings and pets.
Step-by-Step Instructions
Step 1: Choose a kit matched to the child’s age and interest
Match the kit type to the child’s stated interests: pick chemistry sets with color-changing reactions for kids who like mixing things, select crystal-growing kits for patient kids who like watching results develop, buy circuit kits for builders, and grab volcano or slime kits for younger children who want immediate, dramatic results. Verify the printed age range on the box matches the child, and check reviews or the manufacturer’s site for whether experiments tend to work as advertised.
Tip: For a first kit, choose one with at least 8-10 experiments so a single failure does not end the activity. Kits under $25 are usually fine for testing interest before investing in larger sets.
Check: The kit’s age rating matches or is close to the child’s age, and the kit contains the type of experiments the child has shown interest in.
Step 2: Inventory the kit against the parts list
Open the box, lay every component on the table, and tick off each item against the list in the manual. Count experiment packets by number if they are labeled (Packet 1, Packet 2, and so on). Gather anything you will need from the kitchen — water, vinegar, batteries — and place it within reach before you start.
Tip: If something is missing, most manufacturers (Learning Resources, National Geographic, Klutz, and similar brands) will mail replacement parts free if you contact them through their website. Do this before experiment day, not during.
Check: Every item on the parts list is on the table, and household additions are gathered.
Step 3: Set up a protected workspace
Clear a flat surface and cover it with newspaper, a plastic tablecloth, or a baking tray. Place paper towels within arm’s reach. Dress the child in old clothes or an apron, and put safety glasses on both of you if the kit includes them. Choose a space with good lighting and, for anything with fumes or fizzing, decent ventilation — a kitchen with a window or running range fan works.
Tip: A rimmed baking tray under small experiments contains spills and keeps powder from scattering across the table.
Check: The surface is covered, spills can be wiped immediately, and the child is dressed for mess.
Step 4: Read the full experiment instructions aloud together
Read the entire experiment procedure aloud with the child from start to finish before opening any packet. Point out the parts they will handle and the parts you will handle. Ask the child to predict what will happen — this turns the experiment into a test of their idea rather than a magic trick.
Tip: Assign the child an active role: measuring, pouring, stirring, or timing. Experiments where the adult does everything teach nothing and bore kids quickly.
Check: Both of you know what happens first, second, and third, and the child can state one prediction.
Step 5: Follow the steps exactly, in order
Execute the procedure one step at a time, measuring quantities precisely with the kit’s supplied tools. Do not add extra amounts ‘for a bigger reaction’ — most kit chemistry is calibrated, and doubling ingredients changes the outcome or creates overflow. Set the timer where the instructions specify waiting periods, and wait the full time.
Tip: Measure over the tray, not over the table. If a step says ‘add slowly’, add slowly — this instruction usually prevents overflow or ruined crystals.
Check: Each step produces what the manual describes: powders dissolve, colors appear, or fizzing occurs on schedule.
Step 6: Record the result before moving on
Have the child draw or write what happened in a notebook: what it looked like, how long it took, whether it matched their prediction. Photograph the result if it is something visual like a crystal or color change. This takes two minutes and turns a fun activity into an actual scientific habit.
Check: There is a written or drawn record of the experiment and its outcome.
Step 7: Clean up and store chemicals safely
Dispose of finished mixtures as the manual directs — most diluted kit chemicals can go down the sink with plenty of water, but check the disposal section first. Wash all containers, tools, and hands thoroughly. Return unused chemical packets to the original container, seal it, and store it high up or in a locked cabinet away from younger children.
Tip: Never store leftover mixed solutions in unlabeled cups. Either use them in the same session or dispose of them.
Check: The workspace is clean, hands are washed, and the kit box is sealed and stored out of reach.
Common Mistakes to Avoid
- Buying a kit too far above the child’s age range, leading to frustration or unsafe handling of chemicals and small parts. — Stick within one to two years of the printed age rating. Choose physics or nature kits for younger kids; save chemistry sets for the rated age and up.
- Improvising quantities — adding double the powder or extra vinegar to make a bigger reaction. — Measure exactly with the kit’s tools. Kit chemistry is calibrated; extra ingredients usually cause overflow, failed reactions, or messes.
- Starting an experiment before checking whether household items are needed, then scrambling mid-experiment. — Read the ingredients list for the specific experiment the day before and gather everything before the child sits down.
- Letting the adult do the whole experiment while the child watches. — Give the child the measuring, pouring, and stirring jobs. Keep your role to reading instructions, handling anything unsafe, and asking questions.
Troubleshooting
Problem: The reaction does not happen — nothing fizzes, changes color, or grows.
Solution: Check three things in order: did you use the exact quantities, is the water the temperature the manual specifies (some reactions need warm water), and are the chemicals fresh (clumped powder from humidity often fails). Re-run with precise measurements. If it still fails on a new experiment with fresh materials, contact the manufacturer — most will replace defective packets.
Problem: Crystals do not grow after the waiting period.
Solution: Crystal growing is temperature- and vibration-sensitive. Move the container to a spot with stable temperature and no movement (not a windowsill that gets sun part of the day), and wait the full stated time plus two days before giving up. Small seed crystals forming on the growth rock are a sign it is working slowly.
Problem: Overflow or spill during a fizzy reaction.
Solution: Stop pouring immediately, move the container to the tray or sink, and wipe with damp paper towels. Set up the next attempt in a larger container or on the tray, and add the reactive ingredient in smaller amounts. Overflow is a cleanup problem, not a safety emergency, with standard kit chemicals.
Problem: The child loses interest halfway through.
Solution: Switch to a faster, more dramatic experiment from the kit (volcano, slime, or instant color change) and save the slow ones for another day. Short sessions with one clear result beat long sessions with several half-finished experiments.
What Success Looks Like
The session is successful when: the experiment produced the visible result the manual described (fizzing, color change, crystal formation, circuit lighting up, or grown structure); the child performed at least some of the hands-on steps themselves; nothing was spilled that a paper towel could not handle; there is a record of what happened; and the kit is cleaned, sealed, and stored safely. If the first experiment worked and the child asked to do another, the guide has done its job — repeat the process for remaining experiments at a rate of one or two per session.
Next Steps
Work through the remaining experiments in the kit over the following weeks rather than all at once — one session per week keeps interest high. Once the kit is finished, let the child pick the next kit type based on which experiment they liked most, since that reaction is a reliable signal of their real interest area. For kids who outgrow kits, move to open-ended projects using household supplies (baking soda and vinegar investigations, homemade electromagnets, or backyard bug collecting with a magnifying glass). Keep the results notebook going — it becomes a portfolio the child can show at school or science fairs, and reviewing it reinforces what they learned.
Frequently Asked Questions
Are science kit chemicals actually safe for children?
Reputable kits sold for children use food-grade or low-toxicity ingredients like citric acid, baking soda, and baking powder dyes, and they pass safety testing for their age rating. They are safe with adult supervision, glasses, and normal handwashing. Treat all powders as ‘do not eat or rub in eyes’, and keep them away from children below the kit’s rated age.
What age should a child start with science experiment kits?
Simple kits with mixing, magnets, and growing activities work from around age 4 with a parent doing most steps. Independent kits start around 6-8, and chemistry sets with real reactions typically start at 8+. Match the printed rating rather than the child’s enthusiasm level alone.
What if two experiments fail in a row — is the kit defective?
Usually it is a technique issue, not the kit. Re-check quantities, water temperature, and timing, which account for nearly all failures. If a third controlled attempt fails on different experiments, the kit may have degraded or missing materials — contact the manufacturer for replacements.
Can I reuse the kit materials for repeat experiments?
Most chemical packets are single-use. Reusable kits are those built around hardware — circuit kits, microscopes, magnet sets, and robot kits — which can be rebuilt many times. If repeat value matters, choose a hardware-based kit over a consumable chemistry kit.
How much should I explain the science behind each experiment?
Use the kit’s explanation section, which is written at the child’s level, and add one sentence in your own words. The goal at this stage is curiosity and the habit of predicting and observing, not formal understanding. A short ‘why did that happen?’ question back to the child works better than a lecture.
Evergreen bestsellers Picks
bestsellers
As an affiliate, we earn on qualifying purchases.